
How To Run A Js File In Visual Studio Code?
How To Run A Js File In Visual Studio Code? Looking to run a JavaScript file in Visual Studio Code? You’ve come to the right place! In this article, we’ll explore the steps to execute your JavaScript code using the popular code editor, Visual Studio Code.
If you’re a budding coder or someone who wants to dive into JavaScript programming, Visual Studio Code provides an excellent platform for writing, editing, and running your JavaScript code.
Are you ready to get started? Let’s walk through the simple process of running a JavaScript file in Visual Studio Code!

How do I run a file in Visual Studio code?
To run a file in Visual Studio Code, you have two options. The first option is to use the “Run and Debug” feature. You can access this feature by selecting “Run and Debug” on the Debug start view. Alternatively, you can simply press the F5 key, and Visual Studio Code will automatically attempt to run the currently active file.
When you choose to run a file using the “Run and Debug” feature, Visual Studio Code will use its built-in debugging functionality to execute the code. This allows you to set breakpoints, step through the code, and inspect variables at runtime, making it ideal for debugging purposes.
Alternatively, pressing the F5 key will initiate the default run behavior in Visual Studio Code. This means that the program will be executed without any additional debugging features. This option is useful when you simply want to run your code without stepping through it or inspecting variables.
In summary, running a file in Visual Studio Code can be accomplished by selecting “Run and Debug” on the Debug start view or pressing the F5 key. Both options provide a convenient way to execute your code, with the “Run and Debug” feature offering additional debugging capabilities.
How to Run a JS File in Visual Studio Code: A Comprehensive Guide
Running JavaScript files in Visual Studio Code can greatly enhance your coding experience and productivity. In this article, we will explore the different methods and tools available to run JS files in Visual Studio Code. Whether you’re a beginner or an experienced programmer, this guide will provide you with step-by-step instructions and valuable tips to get you started.
Methods to Run JS Files in Visual Studio Code
Running JavaScript files in Visual Studio Code can be achieved through various methods. In this section, we will discuss three popular methods: using the built-in terminal, using an extension, and using the integrated debug feature.
Method 1: Using the Built-In Terminal
The built-in terminal in Visual Studio Code allows you to execute JavaScript code directly within the editor. Here’s how you can run a JS file using the built-in terminal:
1. Open Visual Studio Code and navigate to the JS file you want to run.
2. Open the terminal by clicking on “View” in the menu and selecting “Terminal” or by using the shortcut Ctrl + `.
3. In the terminal, navigate to the location of your JS file using the “cd” command. For example, if your file is located in the “js” folder, you can use the command “cd js” to navigate to that folder.
4. Once you’re in the correct directory, type “node filename.js” in the terminal, replacing “filename” with the name of your JS file.
5. Press Enter to run the JS file. The output will be displayed in the terminal.
This method is simple and doesn’t require any additional extensions or configurations. However, it may not be ideal for more complex projects or scenarios that require advanced debugging features.
Method 2: Using an Extension
Visual Studio Code has a wide range of extensions that can enhance your coding experience. There are several extensions available specifically for running JavaScript files. One popular extension is the “Code Runner” extension. Here’s how you can use it to run a JS file:
1. Open Visual Studio Code and navigate to the JS file you want to run.
2. Open the extensions sidebar by clicking on the square icon on the left sidebar or by using the shortcut Ctrl + Shift + X.
3. Search for “Code Runner” in the extensions marketplace and click on “Install” to install the extension.
4. Once the extension is installed, you can run a JS file by right-clicking on the file and selecting “Run Code” from the context menu. Alternatively, you can use the shortcut Ctrl + Alt + N.
5. The output of the code will be displayed in the integrated output window.
Using an extension like “Code Runner” provides a convenient way to run JS files without the need to open the terminal. It also offers additional features such as customizable execution commands and support for different programming languages.
Method 3: Using the Integrated Debug Feature
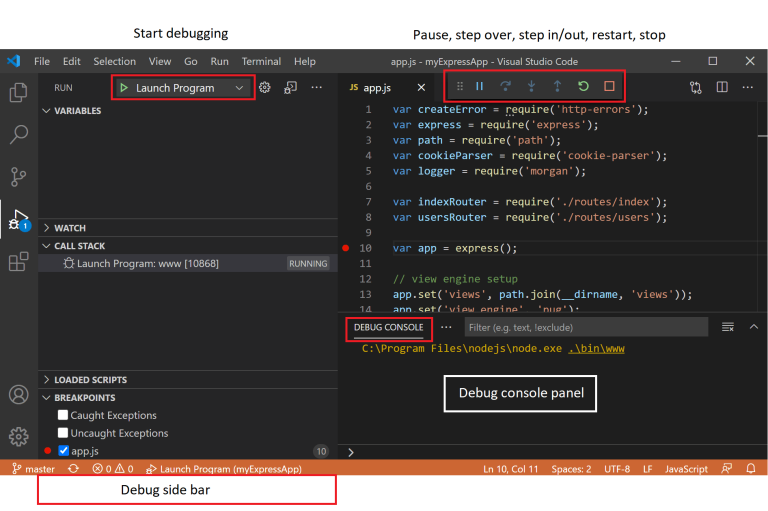
Visual Studio Code comes with a powerful integrated debugging feature that allows you to debug your JavaScript code in real-time. Here’s how you can use the integrated debug feature to run a JS file:
1. Open Visual Studio Code and navigate to the JS file you want to run.
2. Set breakpoints in your code by clicking on the left gutter of the editor or by using the shortcut F9.
3. Open the debug sidebar by clicking on the bug icon on the left sidebar or by using the shortcut Ctrl + Shift + D.
4. Click on the “Add Configuration” button in the debug sidebar to create a new launch configuration.
5. Select “Node.js” as the environment for running your JS file.
6. In the launch configuration file, specify the path to your JS file.
7. Click on the “Start Debugging” button in the debug sidebar or use the shortcut F5 to run your JS file.
8. The code will stop at the breakpoints you set, and you can step through your code, inspect variables, and analyze the execution flow.
The integrated debug feature in Visual Studio Code provides a comprehensive set of tools for debugging JavaScript code. It allows you to find and fix bugs more efficiently, improving the quality of your code.
Additional Tips and Considerations
In addition to the methods mentioned above, here are some additional tips and considerations to keep in mind when running JS files in Visual Studio Code:
1. Always make sure you have the latest version of Node.js installed on your machine, as it is required to run JavaScript files.
2. Consider organizing your code into modules and using a module bundler like Webpack or Rollup for more complex projects.
3. Take advantage of the various debugging options available in Visual Studio Code, such as conditional breakpoints, watch expressions, and the console panel.
4. Explore other useful extensions for JavaScript development, such as ESLint for code linting, Prettier for code formatting, and IntelliSense for autocompletion and code suggestions.
By following these tips and utilizing the powerful features of Visual Studio Code, you can streamline your JavaScript development workflow and write cleaner, more efficient code.
In conclusion, running JavaScript files in Visual Studio Code is a straightforward process that can be done through various methods. Whether you prefer using the built-in terminal, an extension, or the integrated debug feature, Visual Studio Code provides the tools you need to execute and debug your JavaScript code efficiently. Keep exploring the vast ecosystem of extensions and features available in Visual Studio Code to enhance your coding experience even further. Happy coding!
Where do I run a JS file?
To run a JavaScript (JS) file, you can follow these steps:
1. Open the web page or site where you want to execute the JS command.
2. In Google Chrome, click on the three dots located at the top right corner of the browser window to open the Chrome menu.
3. From the Chrome menu, hover over “More Tools” and then click on “Developer Tools.” Alternatively, you can use the shortcut Control+Shift+J (Windows) or Command+Option+J (Mac) to directly open the Console.
By opening the Developer Tools or Console, you gain access to a panel where you can run JavaScript code. This feature is especially useful for developers or individuals who want to interact with and manipulate elements on a webpage using JS.
When the Developer Tools or Console opens, you can look for a tab labeled “Console” or similar, which is where you can input and run JavaScript commands. You can type or paste your JavaScript code into the console and then press Enter to execute it. The console will display any output or error messages resulting from the JavaScript code.
Remember, this method allows you to run JavaScript code on an existing web page or site and observe the immediate results. It serves as a powerful tool for debugging, experimenting, and enhancing web functionality through JavaScript.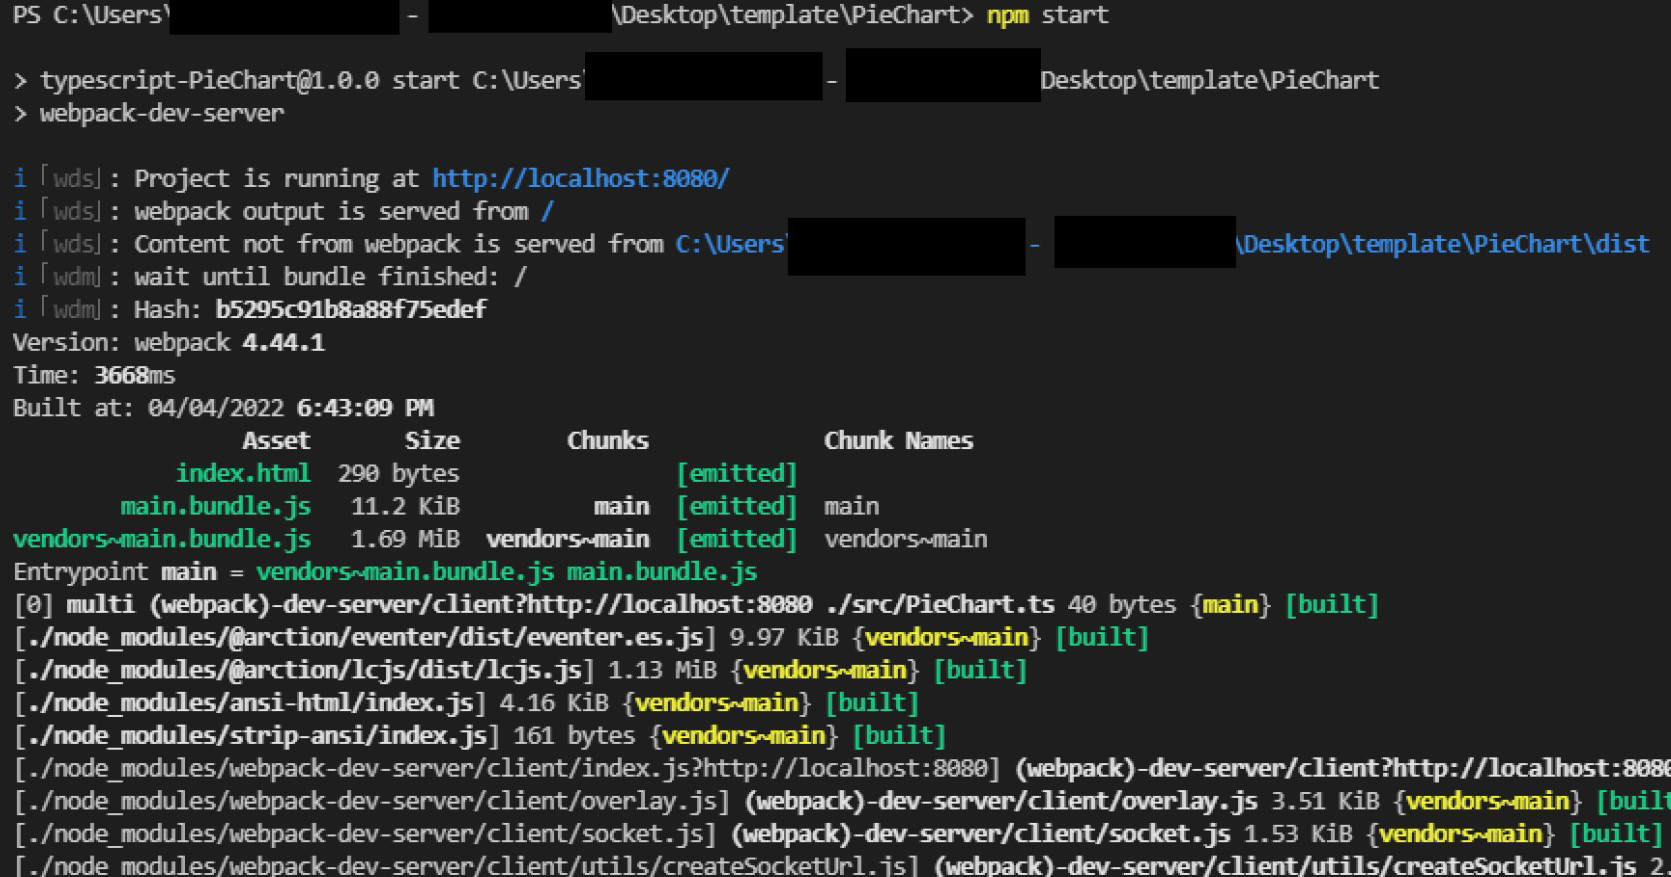
Frequently Asked Questions
Here are some commonly asked questions about Visual Studio code.
How do I run a file in Visual Studio code?
If you want to run or debug a file in Visual Studio code, there are a few ways to do it. One way is to select “Run and Debug” on the Debug start view, which can be accessed from the sidebar. Another option is to simply press the F5 key on your keyboard, and Visual Studio code will attempt to run the file that is currently active. These options make it easy to run and test your code without having to switch between different applications or environments.
Where do I run a JS file?
To run a JavaScript file, you need to first open the web page or site where you want to execute the JavaScript command. Then, in Google Chrome, click on the three dots located on the top right corner of the browser window to access the Chrome menu. From there, go to “More Tools” and select “Developer Tools”. Alternatively, you can press Control + Shift + J on Windows or Command + Option + J on Mac to directly open the Console. This will open a panel where you can run and interact with JavaScript code, allowing you to execute the commands from your file.
How to run js code in Windows?
To run JavaScript code in Windows, you have a couple of options. One way is to open a webpage and right-click on it, then select “Inspect” to open the Developer Tools. Within the Developer Tools, you will find a Console where you can interactively enter JavaScript statements and expressions. Alternatively, you can use the keyboard shortcut Ctrl+Shift+J to directly open the DevTools console. These methods allow you to easily execute JavaScript code and see the output or debug any issues you may encounter.
How do I run a program in Visual Studio Code terminal?
To run a program in the Visual Studio Code terminal, first click on the gear box, which is called the Manage section, and then select Settings. Alternatively, you can use the shortcut keys Ctrl + , (or Command + , for Mac). Once the Settings panel opens, type “Run code in terminal” in the search bar and press Enter. This will enable the functionality to run your code directly in the terminal. Now, you can execute your program by simply opening the code file and selecting the “Run Code” option in the terminal menu.
Summary
Running a JavaScript file in Visual Studio Code is simple and can be done using the integrated terminal. First, open the JavaScript file you want to run. Then, open the terminal by going to the “View” menu, selecting “Terminal”, and clicking on “New Terminal”. In the terminal, type “node” followed by the name of your JavaScript file, and press enter. Your JavaScript code will run, and any output or errors will be displayed in the terminal.
Remember to save your JavaScript file before running it in Visual Studio Code. Also, make sure you have Node.js installed on your computer, as it is required to run JavaScript files using the “node” command. With these simple steps, you can quickly run your JavaScript code and see the results in Visual Studio Code. Happy coding!
Related Posts
What is Microsoft Visual Studio used for?

Is Microsoft Visual Studio for free?
Is Visual Studio C# only?
How To Debug Angular In Visual Studio Code?
How To Run Angular Project In Visual Studio Code?
