How To Run Angular Project In Visual Studio Code?
Are you interested in learning how to run an Angular project in Visual Studio Code? Look no further! In this guide, we’ll explore the steps to get your Angular project up and running in Visual Studio Code, a powerful code editor widely used by developers.
Running an Angular project in Visual Studio Code is a breeze. With its intuitive interface and advanced features, Visual Studio Code provides a seamless development experience for Angular developers. Whether you’re a beginner or an experienced programmer, this guide will walk you through the process, step by step.
So, if you’re ready to dive into the world of Angular development in Visual Studio Code, let’s get started and learn how to set up and run your Angular project with ease!
How to Run an Angular Project in Visual Studio Code: A Comprehensive Guide
If you’re an Angular developer, one of the essential tools in your arsenal is Visual Studio Code (VS Code). With its powerful features and extensive plugin ecosystem, VS Code provides an excellent development environment for Angular projects. In this article, we will walk you through the steps on how to effectively run your Angular project in Visual Studio Code, from setting up the environment to debugging and optimizing your code.
Setting Up the Environment for Angular in Visual Studio Code
Before we dive into running an Angular project in Visual Studio Code, it’s crucial to set up the development environment properly. Here are the steps:
Step 1: Install Node.js and npm
In order to run Angular applications, you need to have Node.js and npm (Node Package Manager) installed on your system. Node.js is a JavaScript runtime built on Chrome’s V8 JavaScript engine, and npm is the default package manager for Node.js. To install Node.js and npm, follow these steps:
- Visit the official Node.js website (https://nodejs.org) and download the LTS (Long-Term Support) version for your operating system.
- Run the downloaded installer and follow the installation instructions.
- After the installation is complete, open a terminal or command prompt and type
node -vandnpm -vto verify that Node.js and npm are installed correctly.
Step 2: Install Angular CLI
The Angular CLI (Command Line Interface) is a powerful tool that helps you scaffold, build, and maintain your Angular applications. To install the Angular CLI, open a terminal or command prompt and run the following command:
npm install -g @angular/cli
This will install the Angular CLI globally on your system.
Step 3: Create a New Angular Project
Once you have the Angular CLI installed, you can create a new Angular project using the following command:
ng new my-angular-project
This will create a new directory named my-angular-project with the basic structure and files of an Angular project.
Step 4: Open the Project in Visual Studio Code
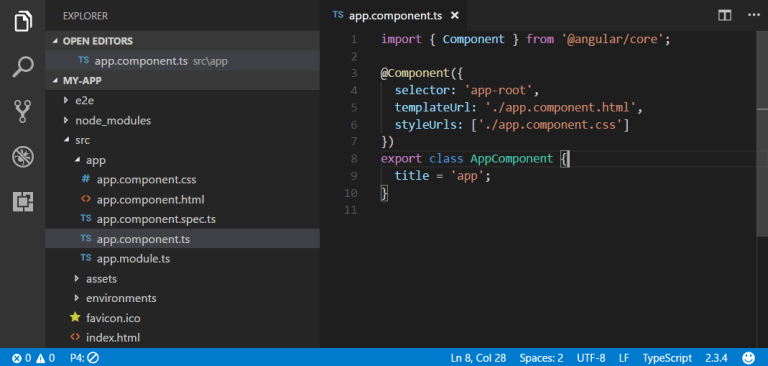
Now that you have a new Angular project created, it’s time to open it in Visual Studio Code. Launch VS Code and click on the “Open Folder” button in the welcome screen or go to “File” > “Open Folder” and select the directory of your Angular project.
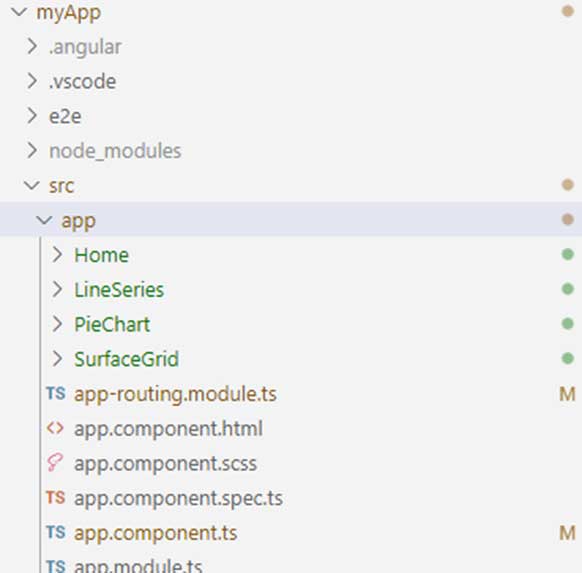
Once the project is opened in Visual Studio Code, you will be able to see the project files and folders in the sidebar.
Running and Debugging an Angular Project in Visual Studio Code
Now that you have your Angular project set up in Visual Studio Code, let’s explore how to run and debug it within the IDE.
Running the Angular Project
To run an Angular project in Visual Studio Code, you can use the integrated terminal or configure a task to automatically build and serve the project. Here are two common approaches:
Approach 1: Using the Integrated Terminal
- Open the integrated terminal in Visual Studio Code by going to “View” > “Terminal” or pressing
Ctrl+`. - Navigate to the root directory of your Angular project using the
cdcommand. - Once you are in the project directory, run the following command to build and serve the project:
ng serve
This command compiles the Angular application and launches a local development server. It also watches for file changes and automatically recompiles the code.
You can view your running Angular application by opening a browser and navigating to http://localhost:4200/.
Approach 2: Using VS Code Tasks
Visual Studio Code allows you to define tasks that can be executed with a hotkey or a command. You can create a custom task to build and serve your Angular project automatically. Here’s how:
- Go to “Terminal” > “Configure Default Build Task” in Visual Studio Code’s menu.
- Select “npm: start” from the provided list.
- Create a file named
tasks.jsonif it doesn’t already exist in the root directory of your project. - Replace the contents of
tasks.jsonwith the following:
“`json
{
“version”: “2.0.0”,
“tasks”: [
{
“label”: “start”,
“type”: “npm”,
“script”: “start”,
“problemMatcher”: []
}
]
}
“`
Save the changes to tasks.json.
Now you can run your Angular project by pressing Ctrl+Shift+B or going to “Terminal” > “Run Build Task” and selecting “npm: start”. This will automatically build and serve your project, similar to the ng serve command.
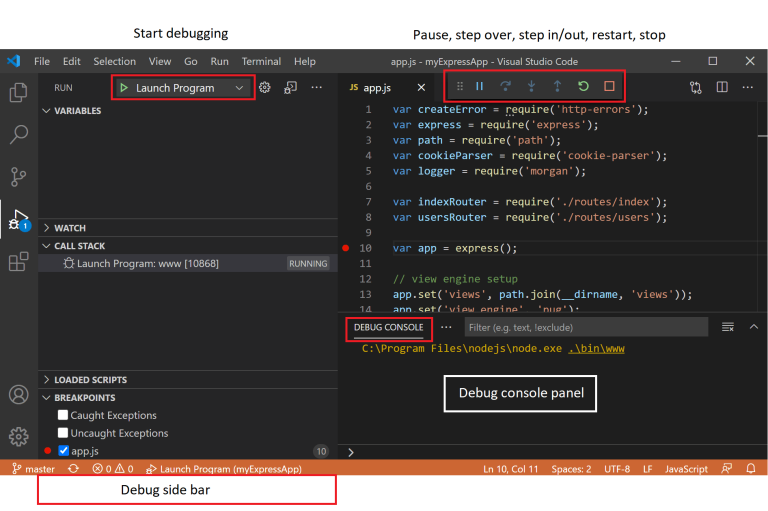
Debugging the Angular Project
Visual Studio Code provides excellent debugging capabilities for Angular applications. To debug your Angular project, follow these steps:
- Make sure your project is running either through the integrated terminal or using the VS Code tasks as mentioned above.
- Click on the “Debug” tab in the sidebar or press
Ctrl+Shift+D. - Click on the gear icon to open the launch config file and select “Chrome” as the debugging environment.
- Add the following configuration to the launch config file:
“`json
{
“version”: “0.2.0”,
“configurations”: [
{
“type”: “chrome”,
“request”: “launch”,
“name”: “Launch Chrome against localhost”,
“url”: “http://localhost:4200”,
“webRoot”: “${workspaceFolder}”
}
]
}
“`
Save the changes to the launch config file.
Now, you can start debugging your Angular project by clicking on the “Start Debugging” button or pressing F5. This will launch a new Chrome instance with built-in debugging tools.
Optimizing Your Angular Project in Visual Studio Code
Handling Performance Bottlenecks
One common challenge when working with Angular projects is optimizing performance. Here are some tips to handle performance bottlenecks:
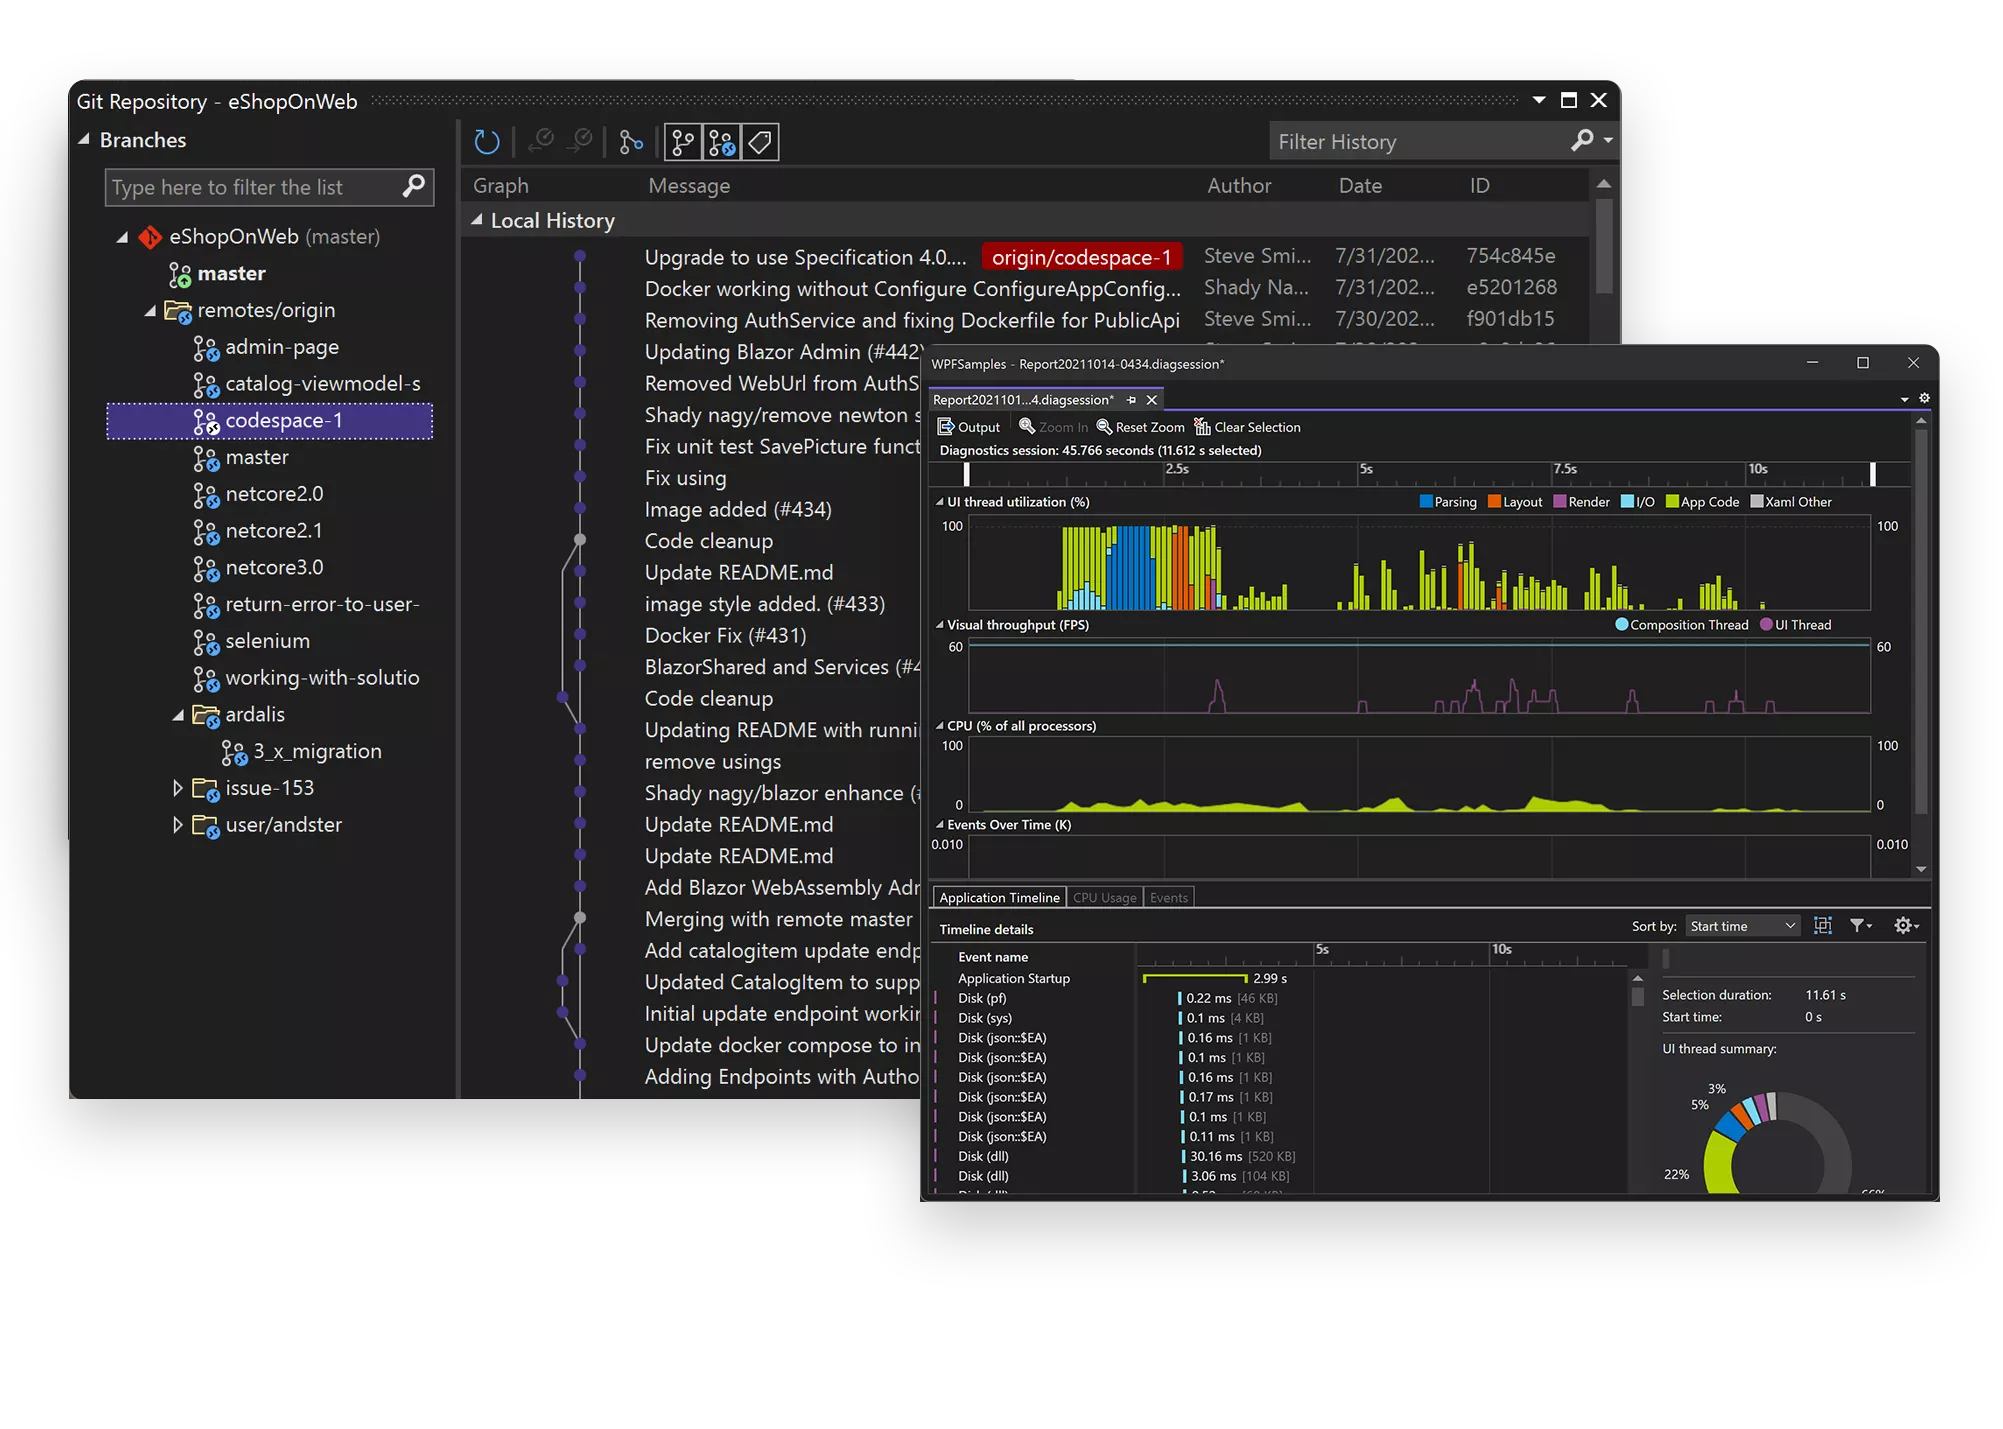
Tip 1: Use the Angular Performance Profiler
Visual Studio Code provides a powerful extension called “Angular Performance Profiler” that helps you analyze and optimize the performance of your Angular application. Install the extension from the Visual Studio Code marketplace and use it to identify and resolve performance bottlenecks.
Tip 2: Leverage Lazy Loading
Lazy loading is a technique that loads only the required modules and components of your application on-demand, reducing the initial load time. Use the Angular CLI to generate lazy-loaded modules and optimize your application’s loading performance.
Tip 3: Minify and Bundle Your Code
Minifying and bundling your code can significantly reduce the size of your Angular application’s files. The Angular CLI provides the option to build your application for production using the ng build --prod command, which performs various optimizations including minification and bundling.
Utilizing VS Code Extensions for Angular Development
Visual Studio Code has a vast ecosystem of extensions that can enhance your Angular development experience. Here are some recommended extensions:
Extension 1: Angular TypeScript Snippets
This extension provides a collection of Angular-specific TypeScript code snippets that can boost your productivity while writing Angular code.
Extension 2: Angular Language Service
The Angular Language Service extension provides TypeScript type checking and autocompletion for Angular templates in Visual Studio Code, improving the development experience.
Extension 3: Prettier – Code Formatter
Prettier is a popular code formatter that can automatically format your code to adhere to a consistent style. Install the Prettier extension and configure it to format your Angular files according to your preferences.
Conclusion
In this comprehensive guide, we have covered the key steps and best practices for running Angular projects in Visual Studio Code. From setting up the development environment to running, debugging, and optimizing your code, you now have the knowledge to make the most out of Angular development in VS Code. Remember to leverage the available extensions and tools to enhance your productivity and deliver high-quality Angular applications.
Summary
So, to summarize, running an Angular project in Visual Studio Code is actually quite simple. First, make sure you have the necessary software installed, like Node.js and the Angular CLI. Then, open up Visual Studio Code and navigate to your project folder. Open the terminal and run ‘ng serve’ to start the development server. And that’s it! Your Angular project will be up and running in Visual Studio Code.
But remember, don’t forget to save your changes and refresh the browser to see the updates. And if you encounter any issues, don’t panic! There are plenty of online resources and communities ready to help you out. So, give it a try, have fun coding, and enjoy building amazing Angular projects in Visual Studio Code!
How To Add Space In Visual Studio Code?
How To Debug Angular In Visual Studio Code?
Related Posts
What is Microsoft Visual Studio used for?

Is Microsoft Visual Studio for free?
Is Visual Studio C# only?
How To Debug Angular In Visual Studio Code?

How To Add Space In Visual Studio Code?
